
Limit a program's internet speed
When a program downloads updates in the background and chokes your connection, you do not have to close it — you can cap its speed instead. The download keeps going while your game or video call stays smooth. The steps below take two minutes and work in the free version.
Steps
- Run Interlimiter as administrator. Interlimiter loads a network driver at startup, so Windows asks for administrator rights. Without them it cannot measure or shape traffic.
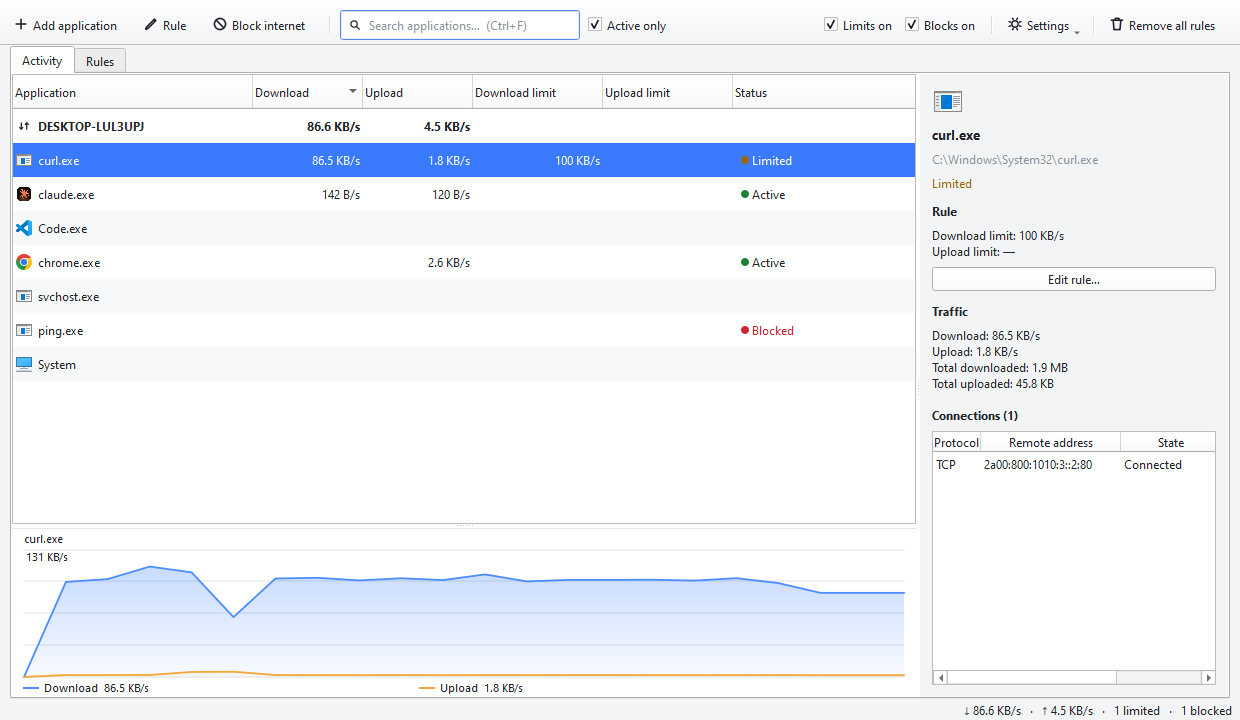
- Find the program you want to limit. The list shows the programs currently using the internet. If you cannot see yours, type its name in the search box (Ctrl+F) or turn off “Active only” to list every running program.
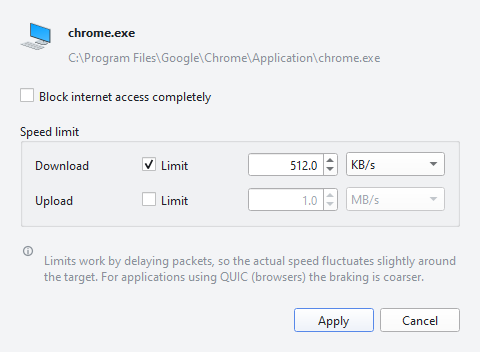
- Open the rule window. Double-click the row, or select it and press Enter. The same window holds both blocking and speed limits.
- Tick “Limit” for download and type the value. You can choose KB/s, MB/s or Mbit/s as the unit. Tick the second row as well if you also want to cap the upload speed.
- Click Apply and watch the result. The row's status becomes “Limited” and the download speed drops to your value within a few seconds. You can see the drop on the graph as well.
Tips
- If you know your connection speed in Mbit/s, enter the limit in Mbit/s too — no conversion needed.
- The real speed fluctuates a little around the target. In our measurements the deviation stays within five to ten percent, which is normal because download limiting is indirect.
- To read every row on the same scale, pin a single unit from the Settings → Units menu.
The limit stays until you remove it, and survives closing and reopening the program. To remove it, select the row and press Del, or delete it from the Rules tab.
Result
One program no longer eats your whole connection. You can cap as many programs as you like the same way — the free version has no limit on how many.